063: My Adobe Audition Podcast Workflow (More or Less)

My Podcast:
Mike Murphy Unplugged teaches one man bands and creative entrepreneurs how to podcast and create online content. I teach the tools I use and love.
Episode 56: The Adobe Audition Show I introduced the Digital Audio Workstation, or DAW, that I use to record and edit my podcasts.
This is a summary of my workflow from Episode 56.
WHAT IS ADOBE AUDITION:
Adobe Audition is a Digital audio workstation, more commonly known in the audio world as DAW or D-A-W. Audition CC is the latest version and it is the software I use to record and edit each podcast episode.
Adobe Audition:
A professional audio workstation for mixing, finishing, and precision editing.
Audition is used to Mix, edit, and create audio content with a comprehensive toolset that includes multitrack, waveform, and spectral display. This powerful audio workstation is designed to accelerate video production workflows and audio finishing — and deliver a polished mix with pristine sound.
How much does it cost?
$19.99/month A la Carte
$49.99/month full Adobe CC (best deal)
Tip: Give the full Adobe CC a test run with a free 30 day trial to try everything out and if Audition CC is all you need, you just saved yourself $30 bucks/month
My Podcast Workflow Using Adobe Audition:
Hardware*:
Microphone:
Shure SM7B dynamic microphone
Cloudlifter-CL1
Audio Interface/Mixer:
Allen & Heath Zed 10 Mixer
*Affiliate Links to benefit podcast happiness fund.
Set Audio Hardware Preferences In Adobe Audition CC:
Set Audio Hardware Preferences Default Input & Output are mapped to my USB Interface CODEC (which is my mixer)

Default Input: is the microphone or device going into Audition. Input…IN. What device is pumping sound into Audition?
Default Output: is the sound going out of Audition and your computer. Where do you want the sound to playback from? Headphones? Speakers? Computer Speakers? I plug my Sony MDR-7506 Headphones into mixer, so Default Output is the same as my Default Input (USB Codec)
MY AUDITION WORKFLOW (The Simple Version):
For each podcast episode:
- Create a master folder for each episode.
Inside I have two folders: Audio & Artwork (thumbnails).
2. Open Adobe Audition
3. Set Default Output & Input to map to Audio Interface/Mixer.
4. Create new blank audio file by going to
File > New Audio File. (Cmd + Shift + N)
5. Add Title:
Sample Rate:44,100.
Channel:Mono
Bit Depth: 32-bit Float
6. Save File to Audio Folder
7. To Show Levels: Hit option + i to show input levels of your microphone. Set levels between -18db & -9db (approximately)
8. Record Podcast & Save this Original File.
9. Make Duplicate of Original:
I save Original to have a clean untouched backup
To make copy: Go to Edit>Copy To New
10. Edit & Clean up on Duplicate Copy
11. New Multitrack Session (Cmd +N)
Create MultiTrack Session from Template
Intro & Outro in Template
Tip: audition cc allows you to create templates, so for me when I create a new multitrack session, I choose the Mike template and my intro and outro are in place and I just need to add my voice track and line it up. Since my podcast is roughly the same length each week, this is about a 2 second ordeal.
12. To Process & Add Polish:
Use the new Audition CC Essential sound panel.
12. Export Multi-Mixdown as .mp3 (44.1, 32-bit float, 128kbps, Mono)
Bit rate (128) will affect file size, so you may want to bump down to 96 kbps and it will reduce file size. I like the higher quality and my shows are only 15 minutes, so I keep it at 128kbps.

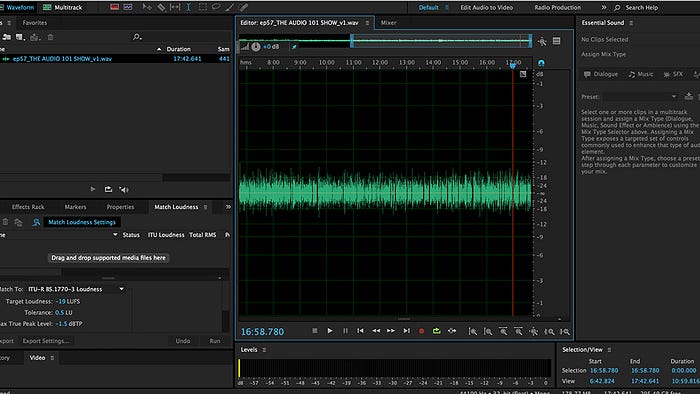
13. Use Match Loudness and make sure the file meets the Broadcast standards of -19LUFS for mono podcasts or -16LUFS for stereo
And that is the speedy version of my entire workflow in Audition.
Podcast:
Mike Murphy Unplugged
I help podcasters and content creators figure things out.
My name is Mike Murphy, I’m a one man band and podcaster.
Learn. Create. Move Forward.
Instagram: mikeunplugged
